
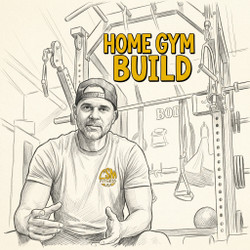
Building a Dream Home Gym from Scratch
Jul 29th 2026
Building a Dream Home Gym from Scratch: Phase 1 (Layout, Equipment Selection & Setup)
Building a home gym might sound simple on paper, but turning a raw space into a sleek, functional workout environment takes serious planning—even for someone who’s been designing gym spaces professionally for over two decades.
Hi, I’m Jose Hernandez from CSN Fitness USA! On a day-to-day basis, my job involves consulting on gym spaces, running 3D renderings, taking measurements, handling moves, and doing full equipment installations. But today, the focus shifts to my own personal home setup.
Here is the story of how I transitioned from losing my garage gym space to launching Phase 1 of my new home gym setup—and the exact process I used to plan it out.
The Backstory: Why the Sudden Rebuild?
During the winter, we had some major home construction projects going on. It was freezing outside, so I let the construction crew use our garage as an indoor workspace. That meant completely clearing out my previous home gym setup.
To stay active, I joined a couple of local commercial gyms. Unfortunately, the experience wasn't great—the spaces didn't fit my training style, and the better facilities were just too far to drive to regularly. On top of that, my wife travels constantly for sales, making home workouts her best option, too.
We decided it was time to rebuild our garage gym, but this time, we wanted to document the entire process so you can see how a professional approaches a home gym build.
Step 1: Measuring & 3D Renderings
Treating a home setup with the same discipline as a full commercial gym is key. Whether you have 2,000 square feet or a tight one-car garage, space efficiency and workflow matter.
Layout Adjustments:
- Clear the Clutter: In our old setup, we had standalone leg extension/curl units and a heavy leg press. While functional, they ate up too much floor space.
- Prioritize Versatility: To ensure both my wife and I could train effectively, we opted for multi-functional units rather than single-purpose machines.
- Dedicated Cardio Space: My wife requested a cardio option for the cold winter months.
- 3D Blueprint: I measured the entire footprint—accounting for obstacles like the garage door—and created a 3D box model to map out clear walkways and equipment placement before buying anything.
Step 2: Selecting the Equipment
When picking equipment for a compact space, versatility and footprint are your top two metrics.
| Equipment | Chosen Model | Primary Reason Chosen |
|---|---|---|
| All-in-One Rack | Bolt Fitness Apex Series Rack | High versatility, 180° arms, storage |
| Compact Dumbbells | SquareBells (up to 55 lbs) | Multi-grip design, space-saving |
| Cardio | Spirit Fitness XT185 Treadmill | Compact, folding design |
| Flooring | Heavy-Duty Rubber Flooring | Floor protection & noise reduction |
- The Centerpiece (Bolt Fitness Apex Series Rack): Instead of a standard power rack, I selected a feature-packed rack from Bolt Fitness. It features 180-degree articulating arms, a high-lat pulldown (crucial for taller users with longer arm reaches), a low row, and integrated shelving for weight plates and accessories.
- Dumbbells (SquareBells): Instead of a massive, space-consuming dumbbell rack, I went with SquareBells (up to 55 lbs). They offer unique multi-grip options while taking up minimal room. (I also added a light set of standard hex dumbbells for incremental weights).
- Cardio (Spirit XT185 Treadmill): We needed a compact, reliable treadmill that could fold up when not in use to keep the floor open. The XT185 fits our weight capacities easily while taking up zero unnecessary real estate.
Step 3: Phase 1 Setup & Delivery
After waiting a couple of weeks for shipping, the installation team built out the core structure.
"Phase 1 is all about getting the 'lion's share' of the main equipment in place to test the footprint before dialing in the aesthetic details."
At this stage, the garage is strictly functional:
- The rubber flooring is down.
- The Bolt rack, treadmill, and dumbbell stations are assembled.
- The layout is fully operational for working out.
What’s Next for Phase 2?
Right now, the space works, but it lacks the modern, welcoming aesthetic we want. Here is what’s on the checklist for the next phase:
- Vertical Storage & Cable Attachments: Wall-mounting J-hooks, spotter arms, fat bars, and specialty handles to clear off the floor.
- Climate Control: Installing a mini-split AC/heating unit to keep the garage comfortable during New England's hot summers and freezing winters.
- Lighting & Paint: Adding LED hex overhead lighting and painting the walls a cohesive, uniform dark scheme.
- Feature Wall: Installing an accent wallpaper or pattern wall behind the main rack.
- Upgraded Garage Door: Upgrading to a full glass garage door down the line to maximize natural lighting.
Building out a proper gym space takes time, trial, and error. Stay tuned for the next update as we dive into paint schemes, storage hacks, and aesthetics!